
Software Overview: Cinema 4D R13 TUTORIAL: HOW TO RENDER
Cinema 4D R13 TUTORIAL: HOW TO RENDER – Cinema 4D R13 is a powerful and versatile 3D modeling, animation, and rendering software. It offers a comprehensive suite of tools for creating high-quality 3D content, from basic modeling to advanced animation and rendering.
The Cinema 4D R13 interface is user-friendly and intuitive, making it easy for beginners to get started. The software also includes a wide range of tutorials and documentation to help users learn the basics and advanced techniques.
To achieve the best results with Cinema 4D R13, mastering the rendering process is crucial. Just like the ongoing debate between Google vs Apple , there are different approaches to rendering. Whether you prefer physical or mental ray, understanding the nuances of each method will elevate your renders.
Advantages of Cinema 4D R13
- Comprehensive toolset for 3D modeling, animation, and rendering
- User-friendly interface and intuitive workflow
- Wide range of tutorials and documentation
- Powerful rendering engine for creating realistic images and animations
Disadvantages of Cinema 4D R13
- Can be expensive for some users
- Some features may be too complex for beginners
- Cubes, spheres, and cylinders:These basic shapes form the foundation of many 3D models.
- Boolean operations:Combine, subtract, or intersect primitives to create more complex shapes.
- Sculpting:Deform models using brushes and tools to add details and organic shapes.
- Retopology:Create a new, optimized mesh over an existing model to improve topology and performance.
- UV mapping:Assign 2D textures to 3D models for realistic surface details.
- The characters in the animated film “Moana”
- The environments in the video game “The Last of Us Part II”
- The architectural visualizations for the Burj Khalifa
- Layer Manager: The Layer Manager allows users to organize and manage multiple layers, controlling their order, opacity, and blending modes.
- Compositing Nodes: Compositing nodes provide a powerful and flexible way to create complex compositing effects. Users can connect different nodes together to create a variety of effects, such as color correction, color grading, and adding special effects.
Modeling Techniques
Cinema 4D offers a comprehensive suite of modeling tools for creating complex 3D models. Beginners can start with primitives, splines, and polygons to build basic shapes, while advanced users can utilize sculpting, retopology, and UV mapping for intricate details.
Primitives
Splines
Splines are curves that define the shape of an object. They can be used to create smooth surfaces, extrusions, and lofts.
Polygons
Polygons are the building blocks of 3D meshes. They can be manipulated to create complex shapes and textures.
Advanced Modeling Techniques
Real-World Modeling Projects
Cinema 4D has been used to create stunning 3D models for films, games, and architecture. Examples include:
Animation Principles
Animation is the art of bringing life to still images or objects. In Cinema 4D, animation is achieved through keyframing, interpolation, and motion paths. These principles are fundamental to creating realistic and engaging animations.
Keyframing involves setting the position, rotation, or scale of an object at specific points in time. The software then interpolates, or calculates, the movement of the object between these keyframes. This creates the illusion of smooth motion.
Motion Paths
Motion paths allow you to define the trajectory of an object’s movement. You can create straight lines, curves, or even complex paths using the Spline tool. The object will follow the path you define, creating a more dynamic and realistic animation.
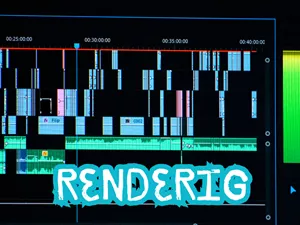
Lighting and Rendering
Effective lighting and rendering are crucial for creating realistic and visually appealing scenes in Cinema 4D. This section will guide you through the process of setting up lighting and choosing the appropriate rendering engine to achieve high-quality results.
Lighting plays a vital role in defining the mood, atmosphere, and visibility of your scene. Cinema 4D R13 offers a range of lighting options, including ambient light, directional light, and point light.
Ambient Light
Ambient light provides a general illumination to the entire scene, creating a sense of overall brightness. It can be used to simulate the effects of natural sunlight or indoor lighting.
Directional Light
Directional light simulates a light source that emits light in a specific direction. It is often used to create shadows and highlights, adding depth and realism to the scene.
Point Light
Point light emits light from a single point, casting a circular shadow. It is ideal for creating focused illumination or simulating light sources such as lamps or spotlights.
Once you have set up your lighting, you need to choose a rendering engine to generate the final image. Cinema 4D R13 offers two main rendering engines: Physical Renderer and Arnold Renderer.
Physical Renderer
Physical Renderer is a physically accurate rendering engine that simulates the behavior of light in the real world. It produces realistic results but can be computationally intensive.
Arnold Renderer, Cinema 4D R13 TUTORIAL: HOW TO RENDER
Arnold Renderer is a biased rendering engine that prioritizes speed and efficiency. It is ideal for creating complex scenes with a large number of objects and lights.
To optimize your render settings, consider factors such as resolution, anti-aliasing, and global illumination. Higher resolution and anti-aliasing settings produce smoother images, but increase render time. Global illumination simulates indirect lighting, enhancing realism but also increasing render time.
By carefully setting up your lighting and choosing the appropriate rendering engine, you can create high-quality renders that bring your scenes to life.
Compositing and Post-Production
In this section, we will explore the compositing and post-production capabilities of Cinema 4D R13. We will learn how to combine multiple rendered layers, perform color correction and grading, add special effects, and export final renders in various formats.
Using Cinema 4D R13’s Compositing Tools
Cinema 4D R13 offers a range of compositing tools that allow users to combine multiple rendered layers into a single cohesive image. These tools include:
