
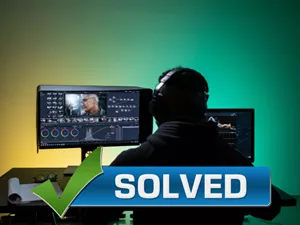
Troubleshooting Common Error Messages: Sony Vegas Help | Common Problems Resolved
Sony Vegas Help | Common Problems Resolved – When working with Sony Vegas, you may encounter various error messages. Understanding the causes and solutions to these errors can help you resolve them efficiently and continue your video editing process smoothly.
“Media Offline” Errors
A “Media Offline” error indicates that Sony Vegas cannot locate the media file you are trying to use. This can occur due to several reasons:
- The media file has been moved or renamed.
- The media file is corrupted or damaged.
- The media file is not compatible with Sony Vegas.
To resolve this error, try the following:
- Check if the media file is in the correct location.
- Try re-importing the media file into Sony Vegas.
- If the media file is corrupted, try repairing it using a file repair tool.
“Preview Not Available” Issues
A “Preview Not Available” issue indicates that Sony Vegas cannot generate a preview of your video. This can occur due to several reasons:
- The video file is too large or complex for Sony Vegas to handle.
- The video file is using a codec that is not supported by Sony Vegas.
- There is a problem with your graphics card or drivers.
To resolve this issue, try the following:
- Reduce the size or complexity of your video file.
- Convert the video file to a codec that is supported by Sony Vegas.
- Update your graphics card drivers.
“Out of Memory” Errors
An “Out of Memory” error indicates that Sony Vegas has run out of available memory. This can occur due to several reasons:
- You have too many programs running simultaneously.
- You are working with a large or complex video file.
- There is a problem with your computer’s memory.
To resolve this error, try the following:
- Close any unnecessary programs.
- Reduce the size or complexity of your video file.
- Restart your computer.
Optimizing Performance and Efficiency
Optimizing your Sony Vegas software for performance and efficiency is crucial for a smooth and efficient video editing experience. In this section, we’ll explore techniques to enhance video rendering speed, allocate system resources effectively, and reduce project file size.
If you’re having trouble with Sony Vegas, check out the help section for common problems resolved. And if you’re looking to add a cool intro to your videos, be sure to check out this Like Button Animation Intro Tutorial . It’s easy to follow and will help you create a professional-looking intro in no time.
Once you’ve got your intro sorted, head back to the Sony Vegas help section for any other issues you might encounter.
Improving Video Rendering Speed
- Use Proxy Files:Create lower-resolution versions of your footage (proxy files) to speed up editing and previewing. Vegas will use these proxies for editing, reducing the load on your system.
- Disable Unnecessary Plugins:Remove any unused plugins from your Vegas installation. Plugins can slow down rendering, so disable the ones you don’t need.
- Optimize Project Settings:Adjust your project settings to match your hardware capabilities. For example, lower the preview resolution or disable hardware acceleration if needed.
Advanced Editing Techniques
In this section, we’ll explore advanced video editing techniques that will help you create professional-quality videos. We’ll cover keyframing, custom transitions, and masking and compositing.Keyframing allows you to control specific parameters of your video over time, such as position, scale, and opacity.
This technique is essential for creating smooth and dynamic animations.Custom transitions can add a polished touch to your videos. You can create your own unique transitions or use pre-made ones to seamlessly connect different clips.Masking and compositing are powerful techniques that allow you to combine multiple video layers and create complex effects.
With masking, you can selectively hide or reveal parts of your video, while compositing allows you to blend different layers together to create realistic effects.
Tips for Color Correction and Grading
Color correction and grading are essential techniques for enhancing the visual appeal and conveying emotions in video editing. By understanding the principles of color theory and applying appropriate techniques, you can transform your videos into visually stunning masterpieces.
Understanding Color Theory
Color theory is the study of how colors interact and affect human perception. The color wheel is a fundamental tool in color theory, representing the primary, secondary, and tertiary colors. Understanding the relationships between these colors allows you to create harmonious and visually pleasing color combinations.
Color Grading Workflow
Color grading involves adjusting the colors in your video to achieve a desired look and feel. A typical color grading workflow includes the following steps:
- White Balance:Adjust the white point to remove any unwanted color casts.
- Color Correction:Use color correction tools to adjust the hue, saturation, and brightness of specific colors.
- Color Grading:Apply creative color grading techniques to enhance the mood and atmosphere of your video.
Using LUTs and Color Presets
LUTs (Look Up Tables) and color presets can streamline your color grading workflow. LUTs are mathematical tables that apply a specific color transformation to your video, while color presets are predefined color settings that can be easily applied to your footage.
Troubleshooting Audio Issues
Audio issues are common in video editing, but they can be easily resolved with the right approach. In this guide, we’ll cover the causes and solutions for audio sync problems, as well as techniques for reducing background noise and improving audio quality.
We’ll also discuss techniques for mixing and mastering audio tracks.
Audio Sync Problems, Sony Vegas Help | Common Problems Resolved
Audio sync problems occur when the audio and video tracks are not aligned correctly. This can be caused by a variety of factors, including:* Different frame rates for the audio and video tracks
- Dropped frames
- Incorrect editing techniques
To resolve audio sync problems, you can try the following:* Check the frame rates of the audio and video tracks and make sure they are the same.
- If there are any dropped frames, you can try to repair them using a video editing software.
- Make sure you are using the correct editing techniques, such as cutting and pasting on the timeline.
Reducing Background Noise
Background noise can be a major problem in audio editing. It can make it difficult to hear the dialogue or music, and it can also make the overall audio sound unprofessional. There are a number of techniques you can use to reduce background noise, including:* Using a noise reduction filter
- Using a noise gate
- Manually editing out the noise
Improving Audio Quality
In addition to reducing background noise, you can also improve the overall audio quality by using the following techniques:* Equalizing the audio
- Compressing the audio
- Limiting the audio
Mixing and Mastering Audio Tracks
Mixing and mastering audio tracks is an important part of the audio editing process. It involves combining multiple audio tracks into a single track and adjusting the levels, panning, and effects to create a cohesive and balanced sound. Here are some tips for mixing and mastering audio tracks:* Start by setting the levels of each track so that they are all at a similar volume.
- Use panning to place the tracks in the stereo field.
- Add effects to each track to enhance the sound, such as EQ, compression, and reverb.
- Master the track by adjusting the overall volume, EQ, and compression to create a polished and professional sound.
