
Introduction to Sony Vegas Pro 10
Sony Vegas Pro 10 Tutorial – How to Render 720p Videos – Sony Vegas Pro 10 is a professional video editing software designed for creating high-quality videos for various purposes, including films, TV shows, documentaries, and web content.
It offers a wide range of features and capabilities that cater to the needs of both beginner and experienced video editors.
User Interface
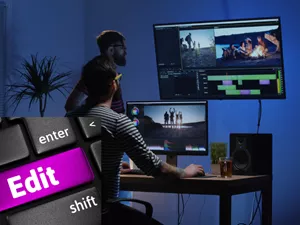
The user interface of Sony Vegas Pro 10 is well-organized and intuitive, with a customizable workspace that allows users to tailor it to their preferences.
The main editing window consists of a timeline, preview window, and various panels for managing media, effects, and transitions.
Key Features, Sony Vegas Pro 10 Tutorial – How to Render 720p Videos
- Timeline-based editing for precise control over video and audio
- Support for multiple video and audio tracks
- Extensive library of transitions, effects, and filters
- Color grading and audio mixing tools
- Motion tracking and compositing capabilities
- Support for various video and audio formats
Step-by-Step Guide to Rendering 720p Videos
Rendering is a crucial step in video production, as it prepares the video for optimal playback across various devices and platforms. Here’s a comprehensive guide on how to render 720p videos in Sony Vegas Pro 10 for high-quality results.
Before rendering, it’s essential to understand the concept of resolution and its impact on video quality. Resolution refers to the number of pixels that make up the video frame, with higher resolutions resulting in sharper and more detailed images. 720p resolution, with a frame size of 1280×720 pixels, is widely used for online videos, DVD playback, and mobile devices.
Settings for Rendering 720p Videos
To render a 720p video in Sony Vegas Pro 10, follow these steps:
- Open the video project in Sony Vegas Pro 10.
- Click on the “File” menu and select “Render As.”
- In the “Render As” window, choose the “Video” tab.
- Under “Format,” select “MPEG-4 AVC (.mp4).” This format provides excellent video quality while maintaining a reasonable file size.
- In the “Video” section, set the “Resolution” to “1280×720.” This will ensure that the video is rendered in 720p resolution.
- For “Bitrate,” choose a value between 4000 and 6000 kbps. Higher bitrates will result in better video quality, but also larger file sizes.
- In the “Frame Rate” section, select “29.97 fps” for NTSC or “25 fps” for PAL. These frame rates are commonly used for video playback.
- Click on the “Advanced” tab and set the “Profile” to “High.” This will optimize the video for high-quality playback.
- Click on the “Render” button to start the rendering process.
Once the rendering is complete, the video will be saved in the specified output folder. You can now share or distribute the video on various platforms.
If you’re working on rendering 720p videos in Sony Vegas Pro 10, you might be wondering about the upcoming Sony Vegas Pro 12. Sony Vegas Pro 12 VS Sony Vegas Pro Edit – Fall Release Date will introduce some exciting new features and enhancements, so it’s worth checking out if you’re considering an upgrade.
But if you’re just getting started with Sony Vegas Pro, the basics of rendering 720p videos are a great place to start.
Tips for Optimizing Rendering Quality
To achieve the best possible rendering quality, consider these additional tips:
- Use high-quality source footage. The quality of the rendered video is heavily dependent on the quality of the original footage.
- Avoid excessive editing and effects. Complex edits and heavy effects can introduce artifacts and reduce video quality.
- Choose the appropriate codec. Different codecs have different strengths and weaknesses. Experiment with different codecs to find the one that best suits your needs.
- Monitor the rendering progress. Keep an eye on the rendering progress to ensure that the video is being rendered as expected.
Troubleshooting Common Rendering Issues: Sony Vegas Pro 10 Tutorial – How To Render 720p Videos
The rendering process in Sony Vegas Pro 10 can occasionally encounter difficulties. Identifying and resolving these issues promptly is crucial for ensuring efficient video production. Let’s delve into some common rendering problems and explore practical solutions to address them.
One frequent issue is slow rendering times. To alleviate this, consider optimizing your project settings. Reducing the video resolution or frame rate can significantly accelerate the rendering process. Additionally, utilizing a more powerful computer or upgrading your graphics card can enhance rendering performance.
Another potential problem is encoding errors. These often occur due to incompatible codecs or insufficient system resources. To resolve this, ensure that you are using a codec supported by your target platform. If necessary, adjust your project settings to select a different codec or reduce the bitrate.
Finally, compatibility problemscan arise when rendering videos for specific devices or platforms. To address this, verify the compatibility of your output format with the intended playback device. If necessary, research the specific requirements for the target device and adjust your rendering settings accordingly.
Advanced Techniques for Enhancing Video Quality
To elevate the quality of your rendered videos beyond the basics, delve into advanced techniques that harness the capabilities of Sony Vegas Pro 10. These techniques empower you to fine-tune color, apply filters, and incorporate seamless transitions, resulting in visually stunning and captivating content.
Furthermore, optimizing video bitrate and frame rate based on the intended platform ensures optimal viewing experiences across devices and platforms.
Color Correction
Mastering color correction is crucial for achieving vibrant and accurate colors in your videos. Sony Vegas Pro 10 provides a comprehensive suite of color correction tools, enabling you to adjust white balance, contrast, saturation, and more. By manipulating these parameters, you can correct color casts, enhance skin tones, and create visually appealing imagery.
Filters
Incorporate filters to add creative flair and stylistic enhancements to your videos. Vegas Pro 10 offers a vast library of filters, ranging from subtle color adjustments to dramatic effects. Experiment with different filters to achieve unique visual aesthetics that align with the tone and message of your video.
Transitions
Smoothly transition between scenes with a variety of transition effects. Vegas Pro 10 provides an array of transition types, including fades, wipes, cross dissolves, and more. By carefully selecting and applying transitions, you can create a cohesive and visually engaging flow throughout your video.
Video Bitrate and Frame Rate Optimization
For optimal video playback on different platforms, it’s essential to optimize video bitrate and frame rate. Higher bitrates result in better video quality but larger file sizes, while higher frame rates provide smoother motion but increase processing demands. By understanding the trade-offs and tailoring these settings to the intended platform, you can ensure your videos are both visually appealing and accessible.
Exporting and Sharing Rendered Videos
When you’ve finished rendering your video, you’ll need to export it to a format that you can share with others. Sony Vegas Pro 10 offers a variety of export options, so you can choose the one that’s best for your needs.
To export your video, go to the File menu and select Export. In the Export window, you’ll need to select the following options:
- File Format:The file format that you choose will depend on how you plan to use the video. If you’re planning to share the video online, you’ll want to choose a format that’s compatible with the platform you’re using.
- Resolution:The resolution of the video will determine its size and quality.
The higher the resolution, the larger the file size and the better the quality.
- Frame Rate:The frame rate of the video will determine how smooth the motion is. The higher the frame rate, the smoother the motion.
- Bitrate:The bitrate of the video will determine the quality of the video.
The higher the bitrate, the better the quality.
Once you’ve selected all of the options, click the Export button. Sony Vegas Pro 10 will start exporting the video. The export time will vary depending on the length of the video and the settings you’ve selected.Once the video has been exported, you can share it with others by uploading it to a video sharing website or by burning it to a DVD.
Sharing Rendered Videos
Once you’ve exported your video, you can share it with others by uploading it to a video sharing website or by burning it to a DVD.
If you’re planning to upload your video to a video sharing website, you’ll need to choose a website that supports the file format you’ve exported your video to. You’ll also need to create an account on the website and upload your video.
If you’re planning to burn your video to a DVD, you’ll need to use a DVD burning program. Once you’ve inserted a blank DVD into your computer, you can open the DVD burning program and drag and drop your video file onto the program’s interface.
The program will burn your video to the DVD.
